SL shots lack so called "depth of field". In RL you focus on something and the elements in front of your focus point and behind it become increasingly unsharp as they are further from the focus point. How blurry they become depends on a number of factors that are not really important here like the focal lenght of your lens, the aperture etc. What does matter is that applying some blur to the background of your pictures brings out your main object and feels more real.
Making a decent blurred background can be a tedious job if you do it the traditional way as explained very well in Vint Falken's tutorial by making a mask. Not anymore...
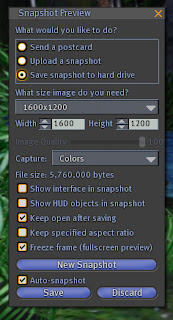 In the snapshot interface select what Bella calls the "Matrix view" i.e. the "freeze frame" option and also select the "keep open" option. Now make your composition and save your picture to disk. Before anything else change the selection "color" to "depth". Save this gray-scale picture to disk as well.
The rest of the story is Photoshop editing. Open both bitmaps in Photoshop. Use control-a to select the whole "depth" picture and and control-c copy it. Now go to the actual colored picture. If you're lucky enough to have CS3 duplicate your background layer* and convert the copy to a smart object (right click the layer for the menu). In the layer thumbnail you should now see the smart object icon. From the filter menu select blur > Gaussian blur and apply a generous dose. In your layer appears a smart filter thumbnail.
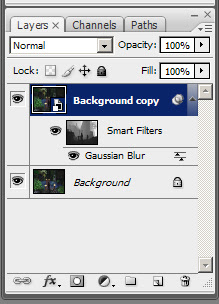 Click it while holding down the alt key. This will open the filter mask. Simply press control-v now to paste the "depth" image into the mask. Click back on the "background copy" layer and bingo, you used the depth image to determine which parts of the picture will be blurred and which not and how much they will be blurred. You can play with the brightness and contrast or the curves of the filter mask to optimise the effect or you can even get a brush out and make some manual adjustments.
If you don't have access to CS3 you can do it another way. Again open both the color version and the depth version of your picture. Start by inverting the depth picture by hitting control-i (or go to the top menu image > adjustments > invert). Select and copy the inverted depth picture as before. Select the color version and make two copies of the background layer. Of the three layers you have now select the middle one and apply some degree of Gaussian blur to it.
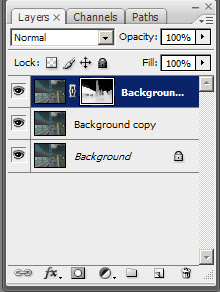 Now select the top one and drag it down to the bottom of the layer box to the little icon looking like a rectangle with a circle in it to add a mask to it (or from the top menu select layer > add vector mask > reveal all). The top layer should now have a white thumbnail next to the regular thumbnail representing your pic. Click it while holding the alt key and use control-v to past the depth pic in your mask. There... two ways to get the same effect.
However, there are some drawbacks. The "depth" picture doesn't pick up on transparent objects so they take on the blur of what's behind them and there is the fact it doesn't account for foreground blur. On top of that the grey areas in the mask are actually partially transparent so the sharp smart object or underlying layer is showing through to some degree which gives those areas a somewhat haloed look. Nevertheless I'm sure it can serve its purpose as a quick way of enhancing a picture.
as an example:
This one...
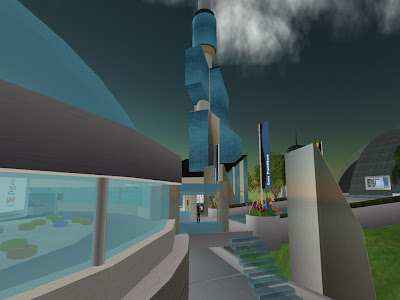
... plus this one ...
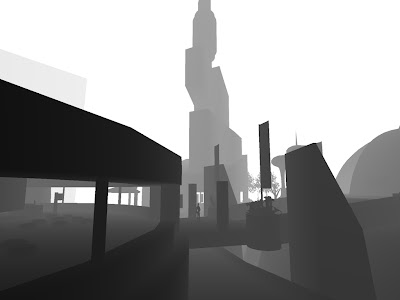
... makes this one :-)

I would love to hear your comments and suggestions on refining this technique and I'd love to see your pictures created using it.
On a side note: sorry for the somewhat messy layout of this post, the template was not intended for tutorials :-)
* I like to keep the original background layer untouched so I can always go back.

8 comments:
Euhm... Loki? Hun? ... Use the depth mask as alpha channel. Then select the color layer and choose filter, blur, lens blur (or smth) from alpha channel. *winks at Loki*
PS. That goes with CSII too! :d
PPS. I never tutorialized that, as Kisa Naumova did. =)
@ post 1: Oh shit .... *grins* and here I thought I stumbled onto something ... *Bows to the mistress *... just the same I think there are a few more possibilities here, specially in the first methode :-) On top of that I don't think a lot of people have actually looked at the depth option, let alone used it like this ...
@ post 2: But ... no smart filters in CS2 the additional methode was just for those unfortunate enough not able to use CS3, that was the whole point :-p
@ post 3: I like yours :-)
One of my favorite 'depth of field' images was posted in SLP:
http://farm1.static.flickr.com/177/479552310_5122613a96.jpg?v 0
I never got around to asking the artist what technique was used on this image, and I know...you didn't create this image yourself, so why am I asking you (hehe); but somehow I thought you might know how to find out and could share it here?!?!
(ack! sorry...I made an error in posting the image code in the previous comment, which can be deleted and corrected it here)
mmm liked to try it out.. but everytime I want to save a depth picture, SL does a David Copperfield.. pooof! , and its gone.. (major crash..) :-(
Is it just me? wrong settings,..?? or? Saving the color version of the pictures is no prob
@Kimo: It was done as described in Vint's "depth of field tutorial"
@Veronique: I have never had any crashes with the depth pictures but that said, I haven't done any since the last client release. I'll try it when I get home from work and let you know if I have the same problem.
Hurrah! Finally I got a web site from where I be able to really get
valuable information regarding my study and knowledge.
Here is my homepage; low cost health insurance
Post a Comment